Special Roman coin pops up after a year

RIC III 109a Antoninus silver plated coin instead of gold version
The process of cleaning: from green with a silver shine (bottom left) to the full silver outside later (above). Antoninus Denarius RIC III 109a – which is normally a golden aureus

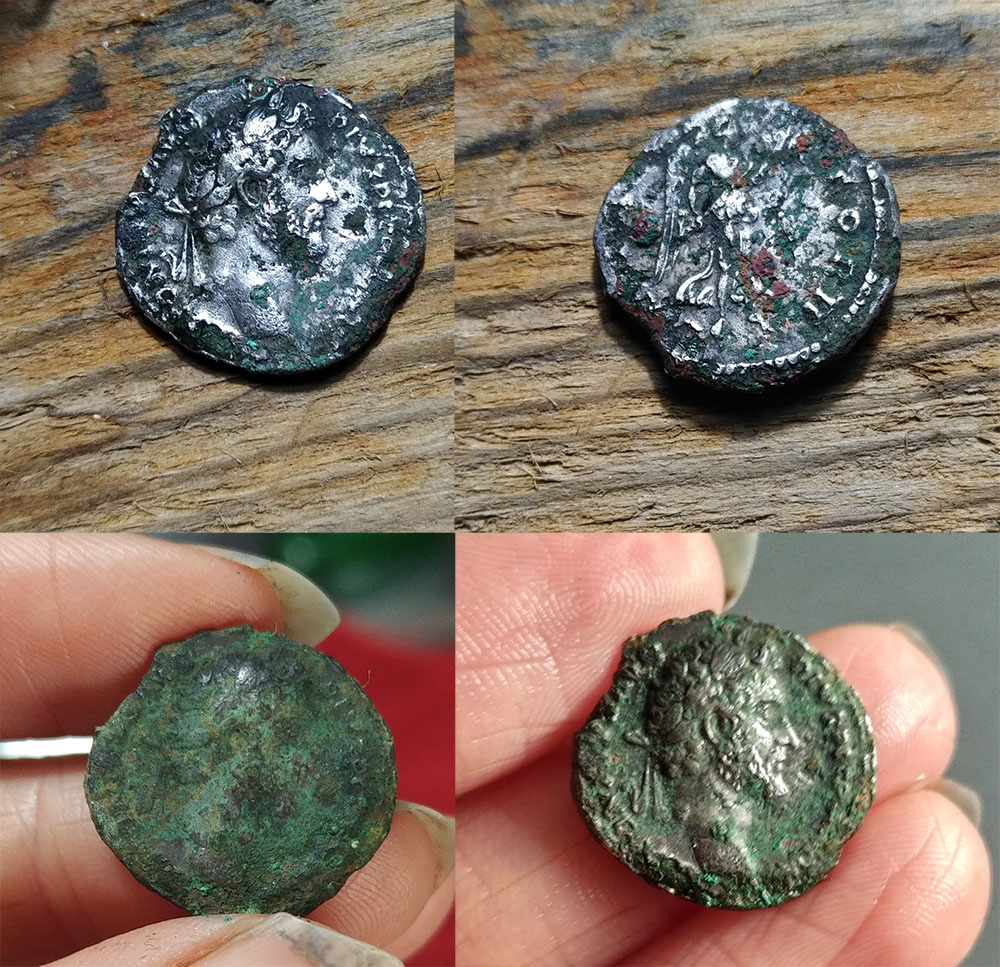
Last year I came home with a small green Roman coin from an otherwise not so interesting hunt. While cleaning with water, on first glance, there was a lot of detail on the guy’s head. It disappeared again when it was dry so i thought – after some fiddling- that it was best to leave it as is. So it stood there for one year until I decided I rather spoil it than to leave the chance to make it better.

Yes acid came into play; I have a plastic box with a lid which houses a smaller plastic box with some acid solution where i put bad coins in. It makes them visible sometimes. The acid is very thin so it took me a dozen of careful drops with an earcleaner to see any difference. and BEHOLD: this is not something you should just attempt on any potential good coin. I have years of practice, aND on top of it: i ruined my first big roman coin that I found i my own yard. Had some weak acid, the hard layer came off a bit, i changed the acid to new acid, and then the coin was eaten too much in a short amount of time; So you learn from these things, but better learn from someone else’s mistakes. I learned to be very careful and not to leave acid for very long. It is diluted with lots of water. Better too slow than too fast.
I also use lemon and this kitchen natriumcarbonate stuff which does miracles for cleaning silver coins. I never knew but it’s super fast and easy.

So the coin turns out to have a very decent silver layer left on it. THe back was even more silvery than I thought. THe inside is copper though so haev to be very careful not to eat away the copper and to make holes.
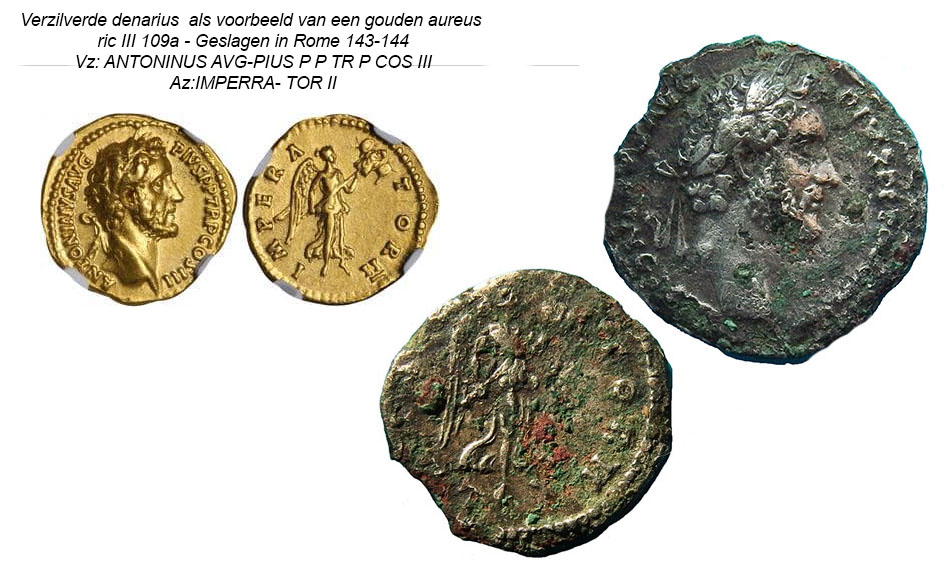
I posted it on the Flemish detection facebook and it turns out it’s a silver/copper version of a gold coin. 2nd century, so it’s 1850 yrs old and still so sharp 😀

so I have to admit, sometimes I’m amazed at what I managed to pull out of the dirt here in what I call ‘the walked flat area of Tongres’.

3D printing – first projects

I was thinking about getting myself a 3D printer a while ago, but then didn’t after I read about all the problems and also the fact I don’t how to make 3D-designs. A few weeks ago I had the same idea again, in combination with a cooperation with my search mate, who is also into making things and he already worked with 3D-designs before. So I ordered the Creality Ender 3 v2 with some extra upgrades (Unicorn tube an springs) to arrive at his house and he got 2 weeks to put it together and to fiddle with it. I didn’t want to start it because I was afraid I would throw the thing out of the window with my lack of patience. Two weeks later, he brought the printer here while he had to study for his course. It took me 2 days to get the PETG to stick properly in all directions and also to design and test my first cable guide for the coil cable with a 45-degree angle. There are several of thosewith a straight guide that you can download from internet, or buy from Ebay etc.. but the cable usually doesn’t run in a straight line alone your shaft. Took me two tutorial videos on Tinkercad and there you go, my first design ! It needed lots of corrections but I’m almost there. I figured it can be used for cables going in both directions around the shaft. If it doesn’t fit, just turn it aroundf.. Boy, did that NOT work lol.
I also downloaded the Minelab Equinox coil support because it’s just a horrible 19th Century design, not ergonomic and the coil ears tend to break easily. This support divides any pressure over the coil itself so it’s not just pushing on the two ears.

My first 2 attempts weren’t very great because the print let go of the bed after a few layers, but I fixed it this morning and printed the whole thing in one go 😀 So second thing I had to solve was to get rid of the supports. The hole in the ears was almost solid print and PETG is quite hard, so i drilled them out, but I am now trying a new print without any support in the holes. If that fails, I will have printed 1.5hr for nothing lol.